Index
Index
- Bird Line Sections
- Comparisons
- Contact Information
- Custom Meter Scales
- Customizing MB-1
- Documentation
- Downloads
- Expansion Features
- Evaluating Analog Meters
- Evaluating Couplers
- FAQ
- Features
- Generic Meter and RF current Measurements
- Hardware Diagnostics
- Interfacing your own Analog Meters
- Interfacing your own Couplers
- Multi-Coupler Display Feature
- Prices
- Programming MB-1
- Projects
- Quick Reference Guide - Menus
- Quick Reference Guide - Switches and LEDs
- Recent Site Updates
- Reviews
- Specifications
- Simulator
- Troubleshooting
- Useful Links
- Using Different Couplers
- Utilities
- Videos
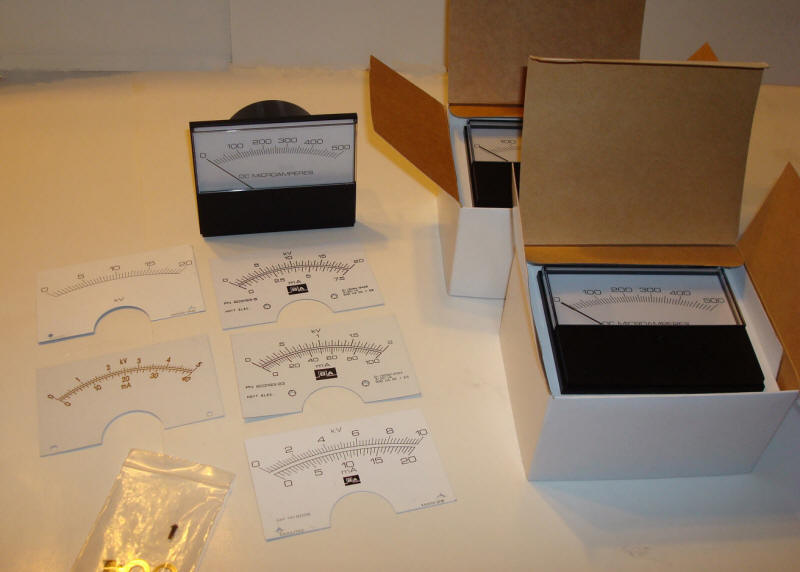
Designing Custom Analog Meter Scales
Below, we show the steps required to design custom scales, and install them in an existing meter.
The meters below were obtained on eBay for $7.50 each. The seller also included some extra scale faces.
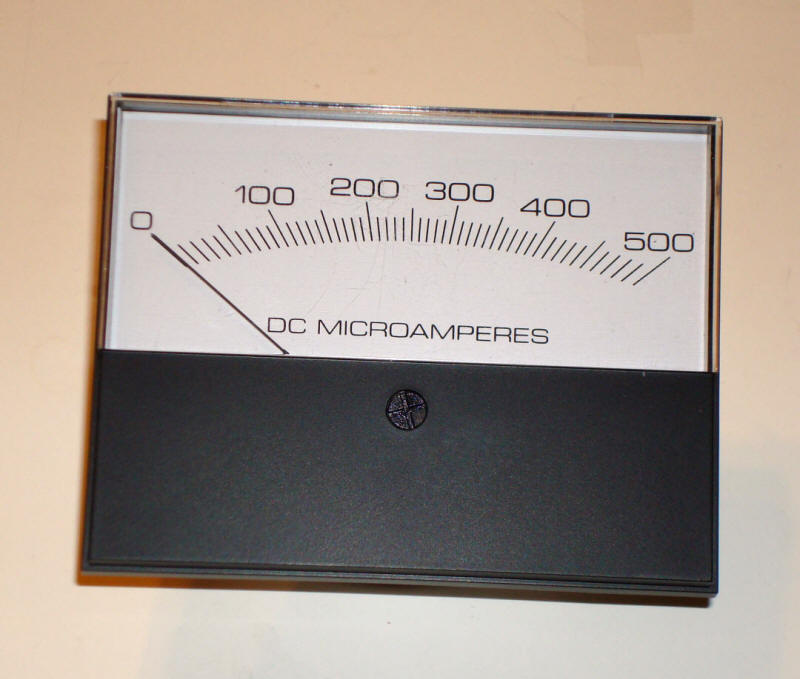
As discussed elsewhere, MB-1 can drive any
analog meter with a full scale current rating of 1 milliamp or
less. The meters faces on these meters showed a full scale value
of 500 microamps. We verified that with the procedure described
here.
The custom scales used below were designed with
Tonne Software's Meter Program. The
Tonne website provides a detailed manual for installing custom
meter faces. An abbreviated description is given below.
MeterBuilder has no business affiliation with Tonne Software.
Steps:
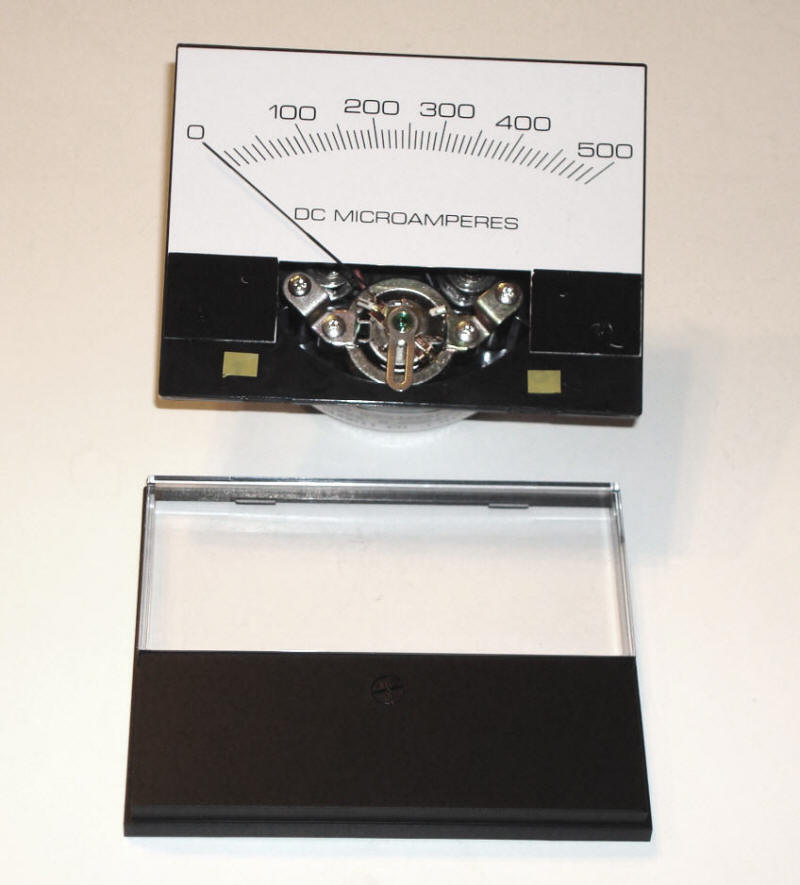
- The meter cover is removed from the meter
by prying from the top. This meter uses a snap-on fit. No
glue or tape is used.
- To remove the existing meter face, pop it
up on the side away from the needle, and rotate CCW until
the plate clears the needle.
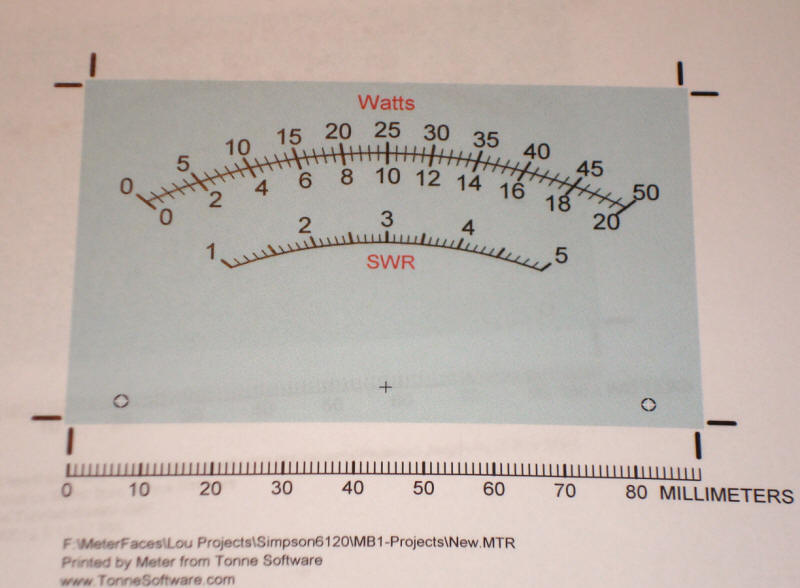
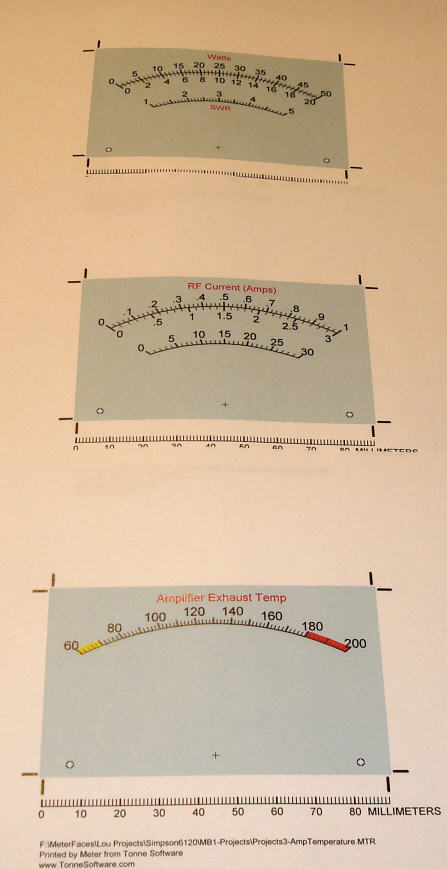
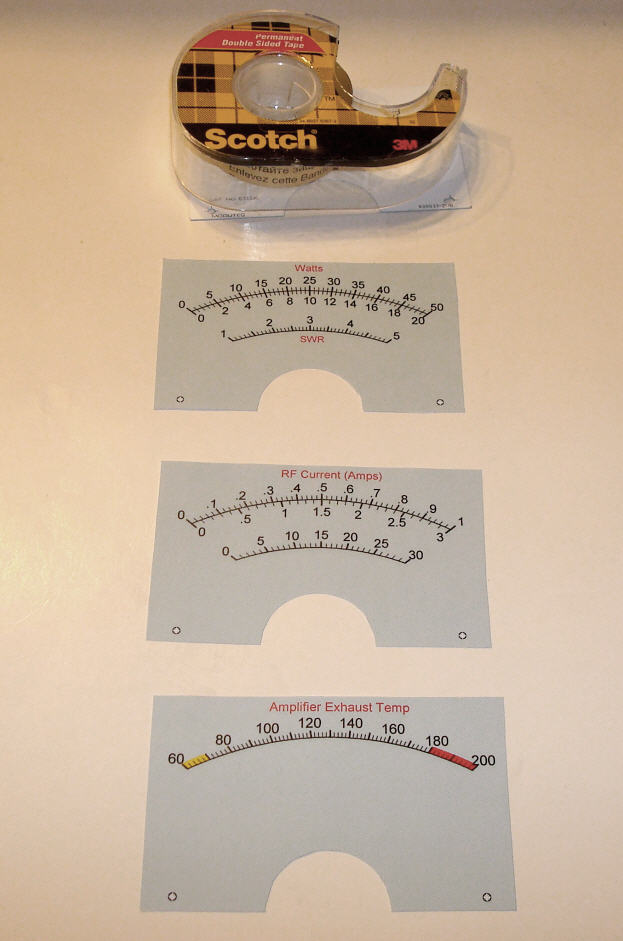
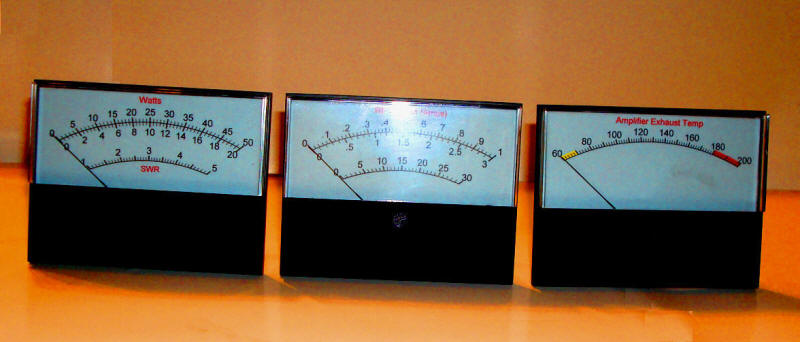
- We made a separate meter face for each of
the three meters: one for power and SWR, one for RF current,
and one to monitor the amplifier exhaust temperature.
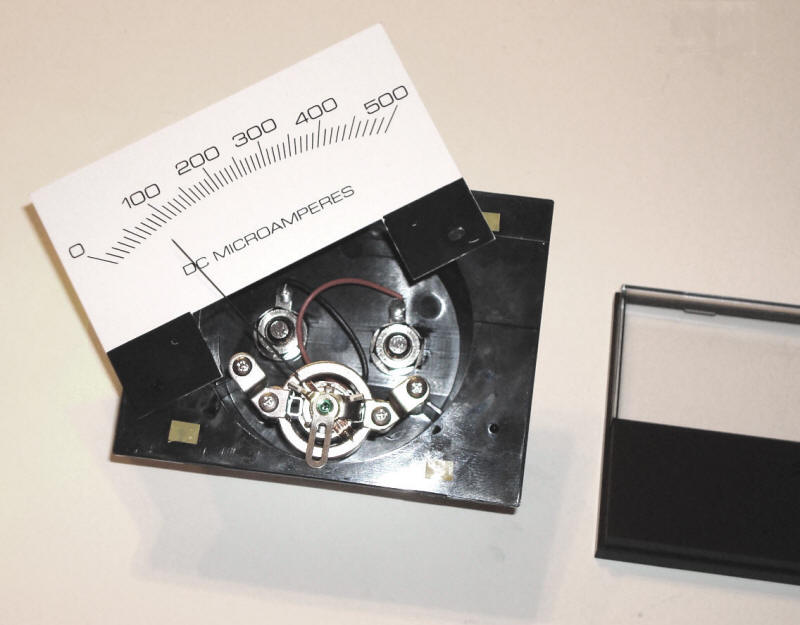
- Line up the removed meter face with the
new face. The two mounting holes on the bottom serve as
convenient reference points. Cut the new face using the
metal meter face as a template.
- Double sided tape was used to affix the
new meter face. Glue can also be used. Mount the face on the
unfinished side of the metal meter face to prevent a shadow
from the original scale.
- Replace the new meter face on the meter
using the same precautions as when removing it. Replace the
meter cover making sure to line up the zeroing screw on the
meter cover with the zeroing tab on the meter movement.
- The meters are now ready to be calibrated with the MB-1 Panel Meter calibration feature.